Showing posts with label main meat dish. Show all posts

Leftover chicken? Easy Chicken Crescents Recipe

  • 2 cups cubed, cooked chicken
  • 3 oz cream cheese
  • 2 tbsp butter
  • 2 tbsp milk
  • 2 tbsp chopped onion
  • 1 package pillsbury crescent rolls
  • pinch salt
  • 2 tbsp melted better
  • shredded cheese (or cheese croutons!)
either bake chicken breasts at 325 degrees for 50 minutes, or if in a hurry, cook it on stove top. cube it. soften butter & cream cheese. blend. add chicken, salt, milk, onion and milk well. unroll crescent rolls into 4 rectangles (so keep two rolls attached together in packages of 8). place chicken mixture in the middle of rectangle and pinch dough so four corners cover mixture and are pressed together (opposite corners together, then all mushed together). brush tops with melted butter and sprinkle with cheese. don't worry if they're messy, that's the point! bake heat/time according to crescent roll directions & then watch until they brown on top.

  • 2 cups cubed, cooked chicken (~3 chicken breasts)
  • 3 oz cream cheese
  • 2 tbsp butter
  • 2 tbsp milk
  • 2 tbsp chopped onion
  • 1 package pillsbury crescent rolls
  • pinch salt
  • 2 tbsp melted better
  • shredded cheese (or cheese croutons!)
either bake chicken breasts at 325 degrees for 50 minutes, or if in a hurry, cook it on stove top. cube it. soften butter & cream cheese. blend. add chicken, salt, milk, onion and milk well. unroll crescent rolls into 4 rectangles (so keep two rolls attached together in packages of 8). place chicken mixture in the middle of rectangle and pinch dough so four corners cover mixture and are pressed together (opposite corners together, then all mushed together). brush tops with melted butter and sprinkle with cheese. don't worry if they're messy, that's the point! bake heat/time according to crescent roll directions & then watch until they brown on top.

Cold Weather Chili

It seems that each part of the country has particular likes and dislikes when it comes to Chili. Some like it hot, some do not. Some like beans, some do not. Some like it sweet, some savory. I say this because you need to find your own "style" when it comes to chili according to what you and your family prefer. This is my style. Less meat, more vegetables. A bit of heat, but only enough to remind you that it's Chili. I'll call it New England Style Chili.

NEW ENGLAND STYLE CHILI


2 large onions, peeled and roughly chopped
2 green peppers, roughly chopped
5-6 stalks celery, roughly chopped, leaves included
4-5 carrots, peeled and diced
2 cloves of garlic, minced (or 2 tsp minced garlic from jar)
2 tbsp olive oil (or vegetable or canola oil)
1 lb. ground beef, (85% lean is good)
3 28oz cans crushed tomatoes
1 can (3 oz?) chopped green chilis such as "Old El Paso"
3 16 oz cans beans (kidney, black, chili, soy or any combination)
2 cups beef broth (or use 2 beef bouillion cubes and 2 cups water)
2 tbsp sugar
2 tbsp tomato paste
1/4 cup cumin
1/4 cup chili powder
2 tbsp oregano
1 tsp salt
1 tsp black pepper


Preparation:
Peel and chop all vegetables. Open cans of tomatoes. Open cans of beans and place beans in a colander and rinse (unless they are canned in chili sauce). Get out all spices and sugar.

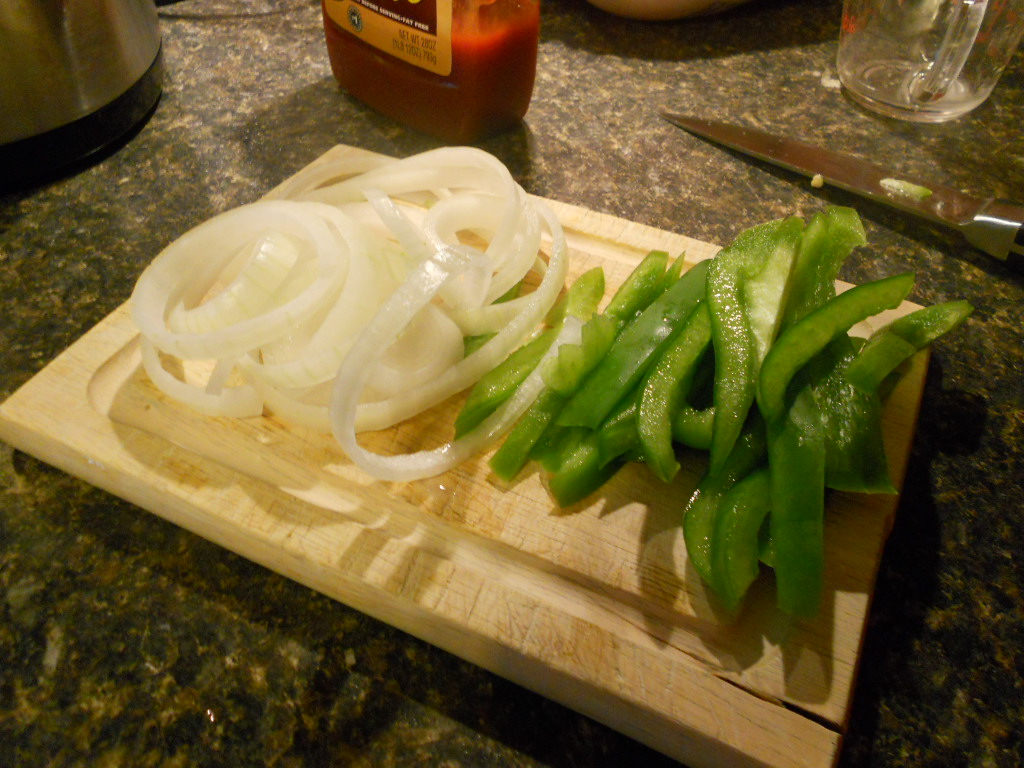
Green pepper, onion, celery

Leeks and carrots (both optional)

Options:
Despite going grocery shopping this morning (sigh), I had only one small green pepper to add to my chili. I opted to use chopped washed leeks, which will add a nice onion flavor. I also added a small can of diced green chilis and about 2 cups of diced turkey (leftover from Thanksgiving and needed to be used up NOW) in addition to the ingredients listed above.

DIRECTIONS:

Add oil to LARGE stockpot and, once oil is hot, add chopped vegetables, including garlic. Let cook, stirring frequently, for about 5 minutes.
Add ground beef, breaking meat "clumps" up with spoon as best you can. Lower heat to medium and continue to cook (and break meat up) until all pink of meat is gone.


Add canned tomatoes, tomato paste and beef broth (if using bouillon, dissolve 2 beef bouillon cubes in 2 cups boiling water before adding to pot). Stir well. Maintain heat so mixture soon comes to a very low boil - or simmer. (Steam will be coming from the top and you will see occasional bubbles in the mixture. You do not want it so hot it maintains a constant bubbly boil.)


Add spices (oregano, cumin, chili powder, salt, pepper) - you might want to try half the quantity of what I've stated in the recipe to start, then adjust to your own personal taste after the chili has been cooking for an hour or so. Do NOT add any spice with heat yet! The longer "hot" spices simmer, the hotter they get.

Loosely cover pot (leave about a one-quarter to one-half inch space between cover and pot on one side), adjust heat (probably down) to maintain simmer, and let mixture simmer for at least 90 minutes, stirring every 15 minutes. When you stir, use a spoon long enough to get down to the bottom of the pot (or you'll have burned chili on the bottom, which will give an overall burned flavor to the rest).

Loosely cover pot, simmer 90 minutes at least.

Chili is one of those dishes that requires a long, slow simmer time to develop all the flavors. Don't be in a hurry!


After 90 minutes (or 2 hours or 3 hours), it's time to add in the beans.

You want to use canned beans, not dry beans in a bag. You can use one or a mixture of types of beans. In this batch I used kidney beans, white northern beans, and a can of "chili beans in sauce" because that's what I had in the pantry. I also like to use black beans and soy beans (soy beans take on the flavor of whatever they're being cooked with). If you're using any bean NOT labelled "in chili sauce" or "for chili", you want to put the beans in a colander and rinse with cold water to get rid of the thick bean "juice" that comes in the can. This also eliminates some of the high sodium found in canned products. You can use less or more beans, depending on how you like your Chili.

After adding the beans, add in the sugar, and give it all a good stir. Return the cover (loosely!) and let simmer for at least another hour. Again, stir every 15 minutes or so -- right down to the bottom of the pan.

NOTE: You add the sugar to the chili  because tomatoes have a very high acid content and, despite being a "sweet" vegetable (fruit, actually), the high acid can be overpowering. You don't want to use a lot of sugar because then the sugar will overpower the tomato flavor! Rule of thumb is 1 tsp. of sugar per 28 oz can of tomatoes. This works in spaghetti sauce as well.

It's taste time. Put a spoonful of the chili mixture in a bowl and let it cool slightly. You can't determine flavors if your mouth and tongue is being burned! Add more spices to your taste. I personally like quite a lot of Cumin. Cumin is the spice you smell when you eat Tacos at a restaurant. It's got a bit of a smoky flavor to it. This, combined with the traditional chili powder and oregano, give chili it's chili flavor! If you like more "heat" to your chili, add a FEW drops of hot sauce, or 1/2 tsp of cayenne pepper or 1 tsp of ground red pepper flakes. Start slow, because you can always add more, but it's very difficult to take that "heat" out.

Once you get your flavors where you want them, let the mixture simmer for another 30 minutes or so.


Today, I served our chili with Cheeze-It crackers and sour cream. I normally serve it with grated cheddar cheese but I didn't pick any up at the store because I thought we had some -- turns out we didn't. I thought the crackers would give the dish some crunch and some cheese flavoring - and I was right. When my husband tried this dish, he asked why it took me 30 years to find out Cheeze-Itz are the perfect topping for Chili!

The BEST (and easiest) BBQ Pork Ribs

I have never served these ribs without receiving lots of ooooh's and ahhhhhh's over them. Easy to fix, no grill needed, but guests will think you slaved away in the kitchen for hours.

INGREDIENTS
Pkg of Pork Loin Back Ribs
1/4 cup water
Fresh or dried Rosemary
Garlic Powder
Your favorite BBQ Sauce*

DIRECTIONS

Use bottom of a broiler pan or any large baking pan that has sides to it (in case the foil leaks, you don't want meat juices baking on the bottom of your oven!). Lightly spray pan with Pam spray.

Tear off two sheets of heavy duty aluminum foil, each about 6-8 inches longer than your rack of ribs. Along the long side, fold the two pieces of foil together (fold over twice) to create one large sheet of foil. Again, lightly spray with Pam Spray.

Remove ribs from package. Rinse gently under cold water (I always rinse any meat that has been sitting in it's own juice). Place ribs in center of foil on top of pan. Lightly sprinkle with Garlic Powder and Rosemary. Do NOT salt at this time. Flip the ribs over and repeat. When you're done, you want the meaty side of the ribs UP, as shown. Pour the 1/4 cup of water around the edges of the ribs on the foil (not on the meat itself as your spices will wash off).


Loosely pull foil up along the long sides and fold over 2 or 3 times. Then fold in each end 2 or 3 times. It's important the foil not be wrapped tightly around the ribs as the extra space allows the ribs to steam.

Fold foil loosely around ribs
Bake in 300 degree oven for about 2 hours.  At the end of that time, open up the foil along the top of the ribs and pour your favorite BBQ sauce over the ribs -- be generous! Return ribs to oven for another 20-30 minutes, or until they are fork tender.

Perfection!
I usually serve these with a baked potato (which you can put in the oven when the ribs have 45 minutes to go) and green tossed salad, or sometimes corn on the cob.

*In Cincinnati, the ONLY BBQ sauce for ribs is Montgomery Inn Barbecue Sauce. Seriously. It's so popular that it's sold not just in the Montgomery Inn itself, but in almost all grocery stores. It's a sweet sauce that has a vinegar base but not an overwhelming vinegar tartness. If you ever see it on your grocer's shelves, grab some!

EASY TUNA CASSEROLE

I admit I keep a jar of Ragu Light Alfredo Sauce and a jar of Ragu Cheese Sauce in my pantry at all times. The Cheese sauce makes my grandson's favorite lunch - macaroni and cheese. The Alfredo Sauce is used for Alfredo Chicken Pizza, with meatballs over spaghetti squash, and here in this tuna casserole. To make your pasta dishes a bit more healthy (but still taste like pasta) do try Dreamfields pasta (get a $1 off coupon on their web site) - much lower in carbs and high in fiber, but tastes exactly like "regular" pasta.

EASY TUNA CASSEROLE

3/4 box Rotini pasta (I use Dreamfields) (elbow macaroni would be fine too)
1 can cream of chicken soup
1/2 soup can of milk
1/2 jar Ragu Classic Alfredo sauce
2 cans tuna packed in water, drained
1 cup frozen peas and carrots (mixed veggies would work too)
1/2 tsp ground red cayenne pepper
1 cup italian bread crumbs (great recipe here)
2 tbsp butter, melted

Cook pasta according to directions, but decrease cooking time slightly to cook just to al dente stage. (Pasta will cook more when casserole is in oven).

Put frozen peas and carrots in strainer, then pour pasta into the strainer to drain. This will quickly defrost the vegetables and drain the pasta at the same time.

Pam-spray a 1 1/2 qt casserole dish.

In large bowl, mix cream of chicken soup, Ragu Alfredo sauce, milk, tuna and cayenne pepper. Add more milk if mixture is very, very thick. Add pasta and mix gently. Pour mixture into casserole dish. Cover (use alum. foil if need be) and cook for 20 minutes at 350 degrees.

Remove foil or cover. Mix bread crumbs and melted butter, and sprinkle over top of casserole. Return to oven for 10 minutes. If crumbs don't brown up, turn the broiler on for just a minute or two until crumbs are nicely browned.

Yum, yum and more yum! Serves 4 to 6.

Buffalo-Style Chicken Thighs with Stir Fry Rice

Three things happened today that caused the creation of this dinner. First, our local grocery store had chicken thighs on sale for .88 a pound, and I purchased ten pounds to separate, package and freeze. When my husband saw them, he requested they be fixed similar to the way I make Buffalo Chicken Wings. Next, we had take-out Chinese food for dinner last night, and I had about a cup and a half of leftover Fried Rice that I wanted to use up.

BUFFALO STYLE CHICKEN THIGHS

Preheat oven at 375. Pam-Spray a baking sheet, then place a rack (the kind you cool cookies on) on the baking sheet and Pam-Spray that as well. (Using the rack allows the fat from the chicken to drip down away from the chicken.)

Place the chicken thighs, skin side up, on the rack, sprinkle with salt and pepper to taste. Place in oven for 40 minutes (we like our chicken well cooked!) or until chicken skin is nicely browned and juices run clear.


In small pan, heat 1/2 stick of butter (I've never tried this with margarine) and 1 cup of Frank's Hot Sauce, over medium heat until the butter is thoroughly melted. Stir gently to mix.

Remove chicken from oven and dip in the Hot Sauce mixture so all sides are covered.


Return chicken to the pan/rack and return to oven. Turn the oven OFF. Leave chicken in the oven while you fix the rest of your meal.

Once you have your rice prepared, bring chicken out of the oven and dip one more time in the hot sauce mixture before placing on the serving plate.

LEFTOVER FRIED RICE

This is what I have that needs to be used up!

I have about a cup and a half of leftover Chinese Fried Rice and a few pieces of boneless short ribs that I need to use up.  I look through my refrigerator and see what vegetables I have that I also need to use up, so this is what I came up with - and it was amazingly good!

You may not have the same vegetables or meat or fruit that I do, but just think it through and add what you have. You can cut carrots into thin slivers and use those. Broccoli cut small would also be good, as would fresh grean beans cut, shredded cabbage, frozen peas, and more. The chick peas give this dish a nice crunch. You could substitute some actual chopped nuts - pecans, almonds. I like a bit of fruity/sweet taste in my Chinese food, so I diced up a half of a peach. Pineapple chunks is a great option here (drained), or you could possibly use a diced sweet apple or pear. Don't be afraid to use what you have, but in stir-fry, you really want to use vegetables that are fresh and will retain some crispness.

If you don't have leftover fried rice, you could use regular white or brown rice, cooked and cooled, and add in a tablespoon of soy sauce and/or a tablespoon  or so of Stir Fry sauce. You could also use a box of Rice-a-Roni style Fried Rice.

New Life for Leftover Fried Rice

1 tbsp olive oil
1/4 cup diced white onion
1/2 cup diced celery
1/4 cup diced orange, red or green pepper
1/4 diced green onions
Small amount of diced boneless pork ribs (optional)
1/2 fresh peach, pit removed, diced, with skin. (Pineapple chunks are also good)
1/4 cup chick peas
2 tbsp of the hot sauce/butter mixture from above.

Place olive oil in saute pan and heat on medium high heat until good and hot. Add onion, celery, pepper, green onions and cook for 5 minutes, stirring frequently. Add rice, diced peach, chick peas and the hot sauce/butter mixture and cook for another 5 minutes, stirring frequently, until everything is heated through.


Here's the finished dish -- and it was great! Serve with a green salad Blue Cheese or Ranch dressing (to give your mouth a chance to cool off).


Enjoy!

Easy Crockpot BBQ Pork Chops

Ingredients:

3-4 Bone-In Pork Chops
1 white onion, thick-sliced
1/2 green pepper, sliced
1 cup your favorite BBQ Sauce
1/4 cup water
Salt, pepper, garlic powder
Pam Spray

Although you don't have to, I prefer to "sear" (brown) my pork chops before putting them in the crockpot. First, the finished product looks more appetizing, but searing the meat also helps it hold in the juices while it cooks.

In a large Pam-sprayed fry pan (or you can use a teaspoon of canola or vegetable oil in place of Pam Spray) on medium high heat, place pork chops. Sprinkle with salt, pepper and garlic powder. Cook until browned on the underside, then flip over and cook on other side.


While the pork chops are browning (about 5 minutes, each side), slice the onion and green pepper.

Place water in crock pot, then 1/2 of the sliced onion and 1/2 of the green pepper you've just sliced. Place pork chops on top, then place the rest of the onions and green pepper. Pour BBQ sauce evenly over all.


Place the top securely on the crockpot, set on HIGH for 4 hours, or on LOW for 8-10 hours. (Helpful hint: If your crockpot cover doesn't fit tightly, place aluminum foil around the edge of the crockpot to make the top fit more firmly. If air escapes, it won't cook like it should.)

Serve with macaroni and cheese and green beans!

Easy Fish, Chips and Corn on the Cob Dinner (3 recipes)

Being from New England, we love fish! Cod and Haddock are favorites, of course. Recently I found a terrific source for beautiful haddock (Jungle Jim's in Hamilton, OH) -- large, thick pieces -- and at a reasonable price ($3.99 a pound, sometimes $4.99 a pound), and I pick some up every few weeks.

So today's recipe is what we had for dinner tonight. A good New England meal. Baked haddock, oven fried chips, and corn on the cob. You can substitute cod or any white fish, but if it is a smaller, thinner cut be sure and reduce your cooking time.

I'm going to step you through fixing the entire dinner, from start to finish -- so it all ends up cooked and hot on the plate at the same time.

Preheat oven at 375 degrees. Make sure your oven rack is in the middle of the oven.

Put on a large pot of water, high heat, to bring to a boil. You will need a lid for this pot.

EASY BAKED HADDOCK
(serves 2)
2 large pieces of Haddock fillet, about 3/4 inch thick
3 or 4 very thin slices of white onion
2 tbsp. dried bread crumbs
2 tbsp. grated parmesian cheese (the green can kind)
Salt, pepper, dried dill
2 large pieces of aluminum foil about 18 inches by width of foil)
1 tablespoon butter
1/4 cup heavy cream (or substitute milk)
Slice of lemon (optional, but tastes better with it!)

Directions are for ONE piece of haddock -- just repeat for 2nd piece.

Pam-Spray aluminum foil. Place fish in middle of the foil. Sprinkle lightly with salt and pepper. Be a bit more generous with the dried dill. Sprinkle 1 tbsp of dried bread crumbs and 1 tbsp grated cheese evenly on top of fish.

Separate onion layers and lay onions across top of fish (In the photo, you can see I also used some diced green onions -- just because I needed to use them up. They are optional). Cut 1/2 tbsp butter in small pieces and place randomly on top of fish.


Seal aluminum foil by folding one time down the length of the foil, keeping foil loose so it doesn't touch top of fish. Seal both ends. Then UNseal the top edge, and gently drizzle heavy cream (or milk) over top of fish.


Re-seal foil, folding down two or three times. Make sure ends and top of foil are all sealed, but keep the foil loose and away from the top of the fish.

If you're cooking the entire dinner, just set the fish aside now. Clean up your prep area and put away everything but your salt and pepper. Be sure and wash your prep area of all fish juices!
 

OVEN BAKED CHIPS

2 medium size white potatoes
1 tbsp olive oil
Salt, pepper to taste
Optional - Red Pepper flakes
Optional - Apple Cider Vinegar

Pam Spray a baking sheet. Your oven should already be preheated to 375 degrees. Wash potatoes under cold water, do not peel.

Place olive oil, salt, pepper and Red Pepper flakes (optional) in large Ziploc bag.


THINLY slice potatoes - 1/8th to 1/4 inch thick. Try and make them all as close to the same size as you can, as this will help them cook evenly.


Place them in Ziploc bag, seal tightly, and move the potatoes around inside the bag until they are evenly coated with olive oil.


Place potatoes on the Pam-Sprayed baking sheet, making sure they are in a single layer with as much space between them as you can manage.

Place potatoes in the oven and set timer for 5 minutes.

When your timer goes off, put the fish in the oven with the potatoes, and re-set your timer for 10 minutes.

At the end of 10 minutes, take your potatoes out and turn them over. If they are sticking to the pan, use a spatula to turn them over carefully. Put potatoes back in the oven.

By now your pot of water should be boiling, so it's time to get the corn on the cob ready!

CRISP FRESH CORN ON THE COB

2 ears of corn on the cob
1 tsp salt
1 tablespoon sugar

First, let's talk about how to tell if the corn at the grocery store or market is fresh. Fresh corn on the cob needs to be in its husk (not in a plastic-wrapped package), as the husk helps preserve the freshness. At the store, open up the husk enough to be able to view the top two inches of the corn. You should see full, plump kernels, all the way to the top of the cob. If you see empty or tiny, hard kernels, it's not fresh enough or not mature enough. Always do this at the store so you don't come home with bad corn. The husks should be a nice medium shade of green and supple to the touch. If they are brown or feel dry, pass it up.

Add salt to your boiling water now.

Remove the husks from the corn. At the bottom of the corn if there is a tough stalk-end, bend it until it breaks off. Pull off as much of the corn silk as you can, then run the corn under cold water and remove the rest.

With your water boiling, and your corn all ready to go in the pot, add 1 tablespoon of sugar to the pot of water. Add your corn. Turn the heat OFF under the corn, put a lid on the pot, and let it cook for 5 minutes.


When the timer goes off, take the fish out of the oven. With kitchen shears, open up the aluminum foil pouch along the top. With a large slotted spatula, remove the fish and put on the dinner plate. Drizzle with a small amount of lemon juice.

Next, take the corn out of the pot and place it in a bowl or on a cutting board to drain.

Now take your potatoes out of the oven. They should be lightly browned. Sparingly sprinkle vinegar on the potatoes, then a bit of salt. Remove to plate that has the fish.

Put drained corn on the cob on plate. Serve with butter, salt and pepper.


That's it! Dinner is ready!

Pork Chops with Peaches and Couscous

Couscous
I can already hear my daughter saying, "Couscous? What's couscous?!" because I never cooked it when she was living here. It's only been in the past year (thank you, Food Network) that it's become a staple in my pantry. Couscous is ground durum wheat and a good way to get some grain into your diet.

I use instant Couscous. You simply add very hot water, cover, and come back in 10 minutes for the finished product. Yes, it IS that easy! Couscous has a rather bland flavor, so you need to serve it with a sauce of some kind (or use it in a pilaf that is well-seasoned). I particularly like it with fruit either added or in the sauce.

Peaches are plentiful and inexpensive in our area right now, so I picked up a dozen peaches a few days ago, only to discover they are not sweet, juicey, fresh peaches, but have an almost tart taste to them. I had to keep this in mind in adapting this recipe.

From start to finish this recipe takes only 20 minutes and has very few ingredients.

PORK CHOPS WITH PEACHES AND COUSCOUS

4 bone-in pork chops, about 1/2 to 3/4 inch thick
1 cup instant couscous
1 tbsp extra virgin olive oil
1/2 medium sized vidalia onion (or red onion), diced
2 peaches, pitted and cut into 8 to 10 wedges each
3 tbsp apple cider vinegar
1 tbsp brown sugar (you can substitute white)
1/2 tsp dried basil
Salt, pepper

Preheat your oven to 400 degrees (Please see the note at the end of the recipe about using your skillet in the oven).

Add hot water to couscous
Bring 1 cup water to a boil. Pour into large bowl, then add 1 cup of instant couscous. Cover bowl with an upside down plate, and set aside.

Cover with plate and set aside.
Heat 1 tbsp olive oil in fry pan over medium high heat. Salt and pepper one side of your pork chops, and put spiced side down in the hot oil. Cook until nicely browned, about 4 minutes.


As your pork chops are cooking, slice peaches. I simply insert my sharp knife at the top of the peach and roll the peach so the knife cuts the length of the peach and back to the top. I turn the peach a quarter turn and do it again. You should then be able to pop the meaty part of the peach away from the pit. Slice the peaches into wedges.


Once browned, turn your pork chops over and brown the other side. You just want to see a nice brown sear -- no black! Cook for another 4 minutes. Take the pork chops out of the pan and put them on a plate.

Put your pork chop pan (with chops removed) back on the heat and add your peach wedges, diced onion, 3 tablespoons of apple cider vinegar (white wine vinegar will also work but NOT white distilled vinegar), a 1 tablespoon of brown sugar. Gently stir to mix it thoroughly and let it cook for just 1 minute. Return pork chops to the pan, moving the peaches to the top of the chops. Sprinkle peaches and chops with the dried basil (or fresh, if you have it!). Just sprinkle it over the top, don't stir anything.


Put your pan in the pre-heated oven. (Again, please see note at bottom of this recipe about putting your fry pan in the oven!) Cook for 8 to 10 minutes. Your peaches should be soft but not mushy.

Remove the plate from your couscous and sprinkle some olive oil over it ("some" being just 1 tsp sprinkled over the couscous). Fluff the couscous with a fork, just as you would instant rice.


Put about one cup of couscous in the middle of your serving plate, place pork chop on top with plenty of peaches, then spoon over some of the sauce from the bottom of the pan over the top.

The finished dish!
IMPORTANT NOTE: Not all fry pans can go into a 400 degree oven! If yours has a plastic handle, it probably shouldn't go in. If you're not sure, better to be safe than sorry. Nothing will make your kitchen smell worse than melting plastic in your oven. Just Pam-Spray a glass baking dish or even a casserole dish, and put your pork chops in there, with the peaches and sauce on top. I'd add an additional 5 minutes to the cooking time, because your baking dish has to heat up (where the fry pan was already very hot).


SUBSTITUTES/ADDITIONS:  You could easily use rice, brown or white, in place of the couscous. In a pinch, you could substitute white sugar for the brown, but I'd add a pinch of cinnamon. This dish would also be good with frozen or fresh green peas (not canned) added to the couscous (just put the frozen peas on top of the dry couscous before adding the hot water).

As you can see, I used less expensive bone-in pork "steaks". These are a slightly darker meat than regular pork chops, much larger, and a little less expensive. Either is fine, but I would not use boneless pork chops unless that's all you have.

Enjoy!

Cooking a Turkey Breast

Our local grocery store has these beautiful, meaty turkey breasts on sale this week, so I thought I'd cook one today and  use it for several meals this week. The turkey breast I bought is 4.5 lbs.

What you need:
Roasting pan
Meat rack (optional)
Meat thermometer
Salt, pepper, poultry seasoning (or Sage)
Whole white onion
Olive oil or butter/margarine
Pam Spray (optional but it will make clean-up easier. You can also line your pan with alumininum foil for easier cleanup)

Preset oven to 325 degrees.Wash your hands before touching the food.

Here's what the turkey breast looks like once I take the plastic wrapping off. The white plastic bag is filled with gizzards. Some keep them to make gravy. Some cook them for pets. Today, I'm throwing mine out.


Just grab the bag, pull it out, and dispose of it. (If you put it in your kitchen trash, it will quickly start to smell, so get it out of the house as soon as you can.)

Next, I wash off the turkey breast in cold water. It's been sitting in it's own liquids in the store, and I want those out. So I gently rinse it and shake any water out.

I place the turkey breast hole-side up in the roasting pan. I have mine sitting on a meat rack, but that's optional. First I sprinkle a bit of salt and pepper in the "cavity", then place a whole, peeled onion (ends removed) in the cavity.

Holding the onion with my hand, I then flip the breast over to sit on the rack.If you don't have a meat rack, use veggies - celery, carrots, whole onions - on the side of the bird to hold it upright! You can lay it on it's side, but if you do, make sure the pan is Pam-sprayed or oiled well, and come back half way through cooking to turn it to it's other side.

Now I rub the outside of the bird with olive oil. You can use soft butter/margarine or even Canola Oil, but I use Olive Oil because it's less saturated fat. Rub the oil all over the outside of the bird. This will help brown/crisp the skin.

Once oiled, sprinkle with Poultry Seasoning or Sage and a bit of black pepper.


Put your meat thermometer in so it goes into the "meatiest" part of the breast. You can see here where I put mine.


Almost done! Put the turkey breast in the middle rack of the oven (that's important!), with the thermometer turned so you can read it easily. Pour about 1/4 to 1/2 cup of water into the bottom of the roasting pan (not on the turkey).  For my 4.5 lbs., the package says to cook for 2.5 to 3 hours, so I set my timer for 2.5 hours. At the end of 2.5 hours, I will look and see what the thermometer says. Proper cooking temperature for turkey is 165 degrees. Keep the turkey in the oven until your thermometer reads 165.

About one hour into your cooking time, and every hour after that, pull your turkey out and baste it. Just use a turkey baster or a large spoon and pick up the juices at the bottom of the pan and pour over the top of the turkey. Do this several times to baste the entire turkey.

Once the thermometer reaches 165, take the turkey out of the oven and cover it loosely with alum. foil, and let it "rest" for 10 minutes. This allows all the good juices to settle down and stay in the bird. If you slice it (or pick at it!) before it's allowed to rest,, those juices will run out and you'll have a very dry turkey.

That's it! You've now cooked a turkey breast. Cooking a whole turkey is exactly the same, except you will cook the bird for much longer.